Now that we’ve looked at some of the practical uses of practicing chi, let’s expand the idea a bit. What if, instead of treating chi as something mystical, we simply think of it as energy?
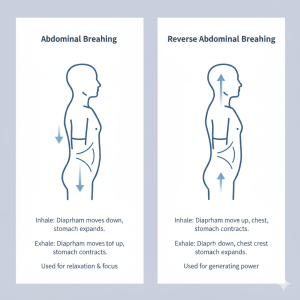
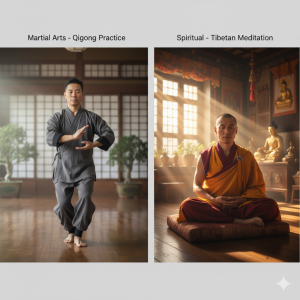
Most people encounter chi through the medical field. Acupuncture and acupressure are well-known practices within Traditional Chinese Medicine (TCM). These methods are commonly used to improve blood flow, relieve strained muscles, and reduce pressure on pinched nerves. There are also movement-based practices such as Tai Chi and Chi Kung, both of which have been shown to support balance, circulation, mobility, and overall health.
These applications are fairly easy to understand and accept. But what about the harder-to-believe phenomena that people often explain using chi?
A Story of Voices
When I was younger, I moved into my grandfather’s house after he passed away. My grandmother and uncle had also died in that same house. It always felt a little eerie, but one particular week was especially unsettling.
At the time, I played guitar constantly—easily three to four hours a day. That week, I was preparing for a performance, so I practiced even more than usual. Even though I was typically alone in the house, I began hearing voices. I was young, tired, and didn’t understand what was happening.
At first, I told myself I just needed sleep. But the voices kept coming back. I started wondering if the house was haunted, even though everyone who had passed there would have been friendly. Eventually, I worried that I might be losing my mind. I noticed a pattern: I would play guitar for hours, stop, and then the voices would begin.
Then one day, a friend came over—and to my surprise, he heard them too.
He looked over at my amplifier, walked over, turned it off, and the voices stopped instantly.
I didn’t know it at the time, but guitar amplifiers share many of the same electrical components as radios. Because my amp had been left on almost constantly, it was occasionally picking up radio signals. There was nothing mystical, spooky, or supernatural about it. It was just electronics doing what electronics do.
In my opinion, chi works in a very similar way.
There are many things in our environment with electrical properties, energetic interactions, or scientific explanations that we don’t immediately understand. It’s often easier to say, “That’s chi,” than to dig into why something is happening.
Over the years, I’ve seen many situations like this and later understood them through studying electronics. Random lights in the sky, for example, are often caused by gases released near transformers. Even something like a capacitor—which stores energy much like a battery—can form accidentally. All it takes are two conductors separated by an insulator, and that insulator can be nothing more than air. When enough energy builds up, it arcs or discharges to the other conductor.
Because of this, seeing a sudden spark in a ceiling or wall isn’t as uncommon or mysterious as people might think. In many cases, it’s simply physics at work.
Conclusion
In conclusion, many of the things we refer to as chi may not be mysterious forces at all, but expressions of physics—the ways energy interacts with its environment, both living and inanimate. Electricity, pressure, circulation, and nervous system responses can explain many phenomena once thought to be unseen or unknowable.
That said, the practices and beliefs surrounding chi have undeniably supported and improved human health. Long before modern medical technology existed, practitioners sought to understand the inner workings of the body through observation, experience, and careful study. At one time, the only way to see internal organs was through dissection or risky surgery. Today, we have X-rays, ultrasounds, and advanced imaging that allow us to observe what earlier practitioners could only infer.
In many ways, chi can be seen as an early framework for understanding energy and function in the human body—developed before the tools existed to explain it in scientific terms. So whether one believes in chi as a literal force or views it as a descriptive model, it’s difficult to deny the positive impact these ideas and practices have had on health, movement, and medicine as a whole.