Hey everyone!
Welcome back to the blog! If you’ve been following my 30 Days to the Splits challenge, you know how much we’ve been working on flexibility. Flexibility training isn’t just about looking cool or hitting a specific goal—it’s crucial for anyone, especially martial artists. Whether you’re practicing kicks, stances, or self-defense techniques, flexibility plays a huge role in your overall martial arts performance.
Why Flexibility is Essential for Martial Artists
Here’s how working on your flexibility can take your martial arts to the next level:
- Increased Kicking Speed and Power: A flexible body allows for a greater range of motion, which means faster, more explosive kicks. When your muscles aren’t tight, your body can move more fluidly, allowing for powerful, high-speed kicks without strain.
- Better Kicking Height and Range: Flexibility helps you kick higher and further with better control. Whether you’re throwing high kicks in sparring or just training with kicking pads, being able to reach your target with precision gives you a practical advantage.
- More Effective Stances: A wider, deeper stance can give you more balance and stability. Flexibility in your hips, legs, and back helps you sink lower into your stances, which not only improves balance but also builds strength in key areas, adding more power to your techniques.
- Quicker Recovery Between Movements: Flexibility training makes it easier to transition between techniques, reducing the amount of time your muscles need to recover between movements. This means smoother, faster combinations, whether in training or sparring.
- Reduced Risk of Injury: Martial arts is a dynamic and often high-impact activity, which puts strain on the body. Flexibility helps protect you from injury by keeping muscles and joints prepared for sudden or extreme movements, allowing you to train more efficiently.
My Top Gear for Flexibility Training
To get the most out of your flexibility journey, it helps to have the right tools. Here are a few products I personally recommend from Century Martial Arts to aid your flexibility training:
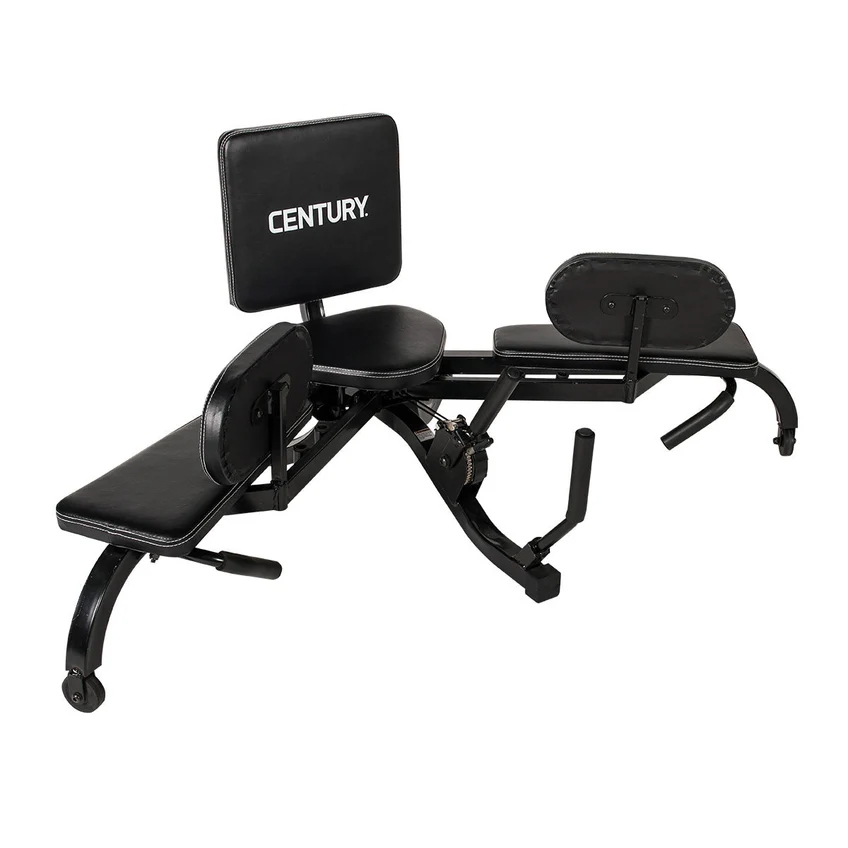
- Leg Stretching Machine: If you want to really focus on improving your splits or increasing your range for high kicks, a leg stretcher can be a game-changer. Check out this one from Century Martial Arts for a smooth, controlled stretch every time.
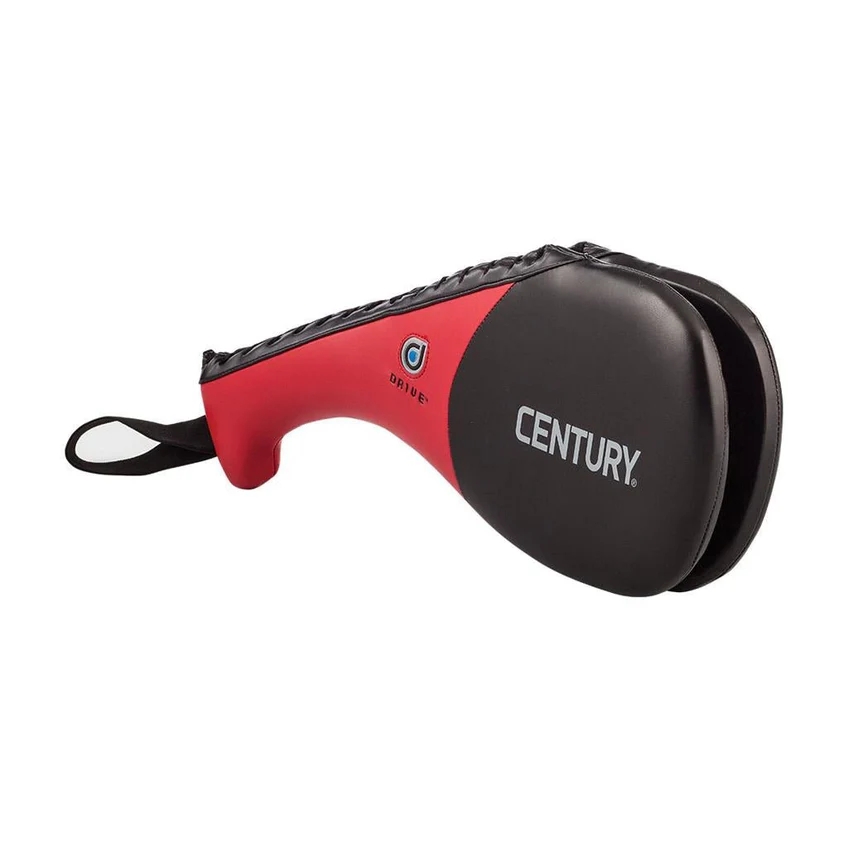
- Kick Target Pads: As you improve your flexibility, practicing high kicks on a target helps measure your progress. Century Martial Arts’ kick targets are durable and designed for heavy use.
(Affiliate links above help support the channel and allow me to continue creating content for you!)
Start Your Flexibility Journey Today!
If you’re looking to improve your martial arts skills—whether it’s kicking higher, moving faster, or staying injury-free—flexibility training is key. Even small gains in flexibility can make a huge difference in your martial arts performance.
If you haven’t yet, be sure to subscribe to my YouTube channel to follow along with my 30 Days to the Splits challenge. We’re in this together, and I can’t wait to see how far we all go!